Showing posts with label windows xp restore. Show all posts

Thursday, February 4, 2010

How to Backup Hard Disk with Least Time Taken

I saw a cartoon the other day. A man called his computer supporter:” my hard disk is making noise. What can I do?” The other side answered:” do you back up?” Then he jump back in terror from the computer for a distance and asked:” why back? Is it gonna blow up?”

Of course the support was asking whether the man had made hard disk backup for his computer, but it seems that the man was totally computer-proof.

Usually technical supporters will suggest you restore your computer when you are blocked removing computer problems yourself. This is the most effective way to remove all non-hardware problems, and of course the precondition is that you have made hard disk backup.

Now I'd like to introduce a new way to backup hard disk that enables you to make hard disk backup timely, regularly and whenever you want----using a Windows system restore software.

This is a new concept of hard disk backup. First let’s see how traditional backup program works: reboot first, and then you may need to change BIOS as start from CD, and then start to backup, and then wait for minutes and minutes, and then reboot computer, change BIOS back, at last, reboot. This results in that people seldom make hard disk backup, and then it results in that their backup is not up-to-date, and at last they are afraid of restoring computer when it’s down because they will lose all new added data. And you may use Windows System Restore, but it won’t backup your installed programs, documents and other files, anything that doesn’t belong to the operating system won’t be backed up.

On the other hand, system restore software takes snapshots to backup hard disk. There is no reboot, and all is done in five seconds. This feature perfectly solves the problem of traditional backup program. You can backup hard disk instantly whenever you want and thus all new added data is included in backups.


See the picture? Just type the name of snapshot and confirm, and then the hard disk backup is done. When your computer is down, you can use it to restore your computer backup to normal.

Besides manual operation, you can also set schedule to make hard disk backup.


Daily, weekly, monthly and on certain time point, events trigger and on every system boot, these will help you make all your current data backed up.

There is no reason to deny restore is the fastest and most thorough way to remove all computer problems. It saves time and efforts. Now that there is a convenient way to make hard disk backup timely, backup yours now.

Original on www.system-tools-software.com: How to backup hard disk timely.

Monday, January 25, 2010

Four Steps to Make Your New PC Hassle-Free

Part 1: Create a System-Repair Disc

Did Santa bring you a new PC this year? That's great! You must have been a good little user.

While I'm sure you're eager to start using the new system, it's worth taking a little time to "hassle-proof" it first. Step one: Create a system repair disc.

See, you never know when some catastrophe will strike your PC, rendering it unable to boot. And because few vendors these days bundle actual operating-system discs, it's up to you to build a bootable CD or DVD that can help save the day.

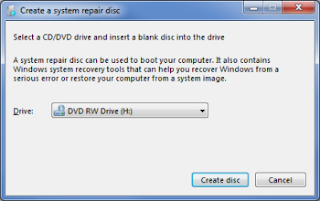
Thankfully, Windows 7 makes this quite easy. Just click Start, type repair, and then click Create a System Repair Disc. Pop a blank CD or DVD into your drive (netbook users will need to connect an external one), click Create disc, and then sit back while Windows gets to work.


When it's done, label the disc, file it away, and hope you never need it. If you do, you can boot the disc to load a basic repair environment with diagnostic tools and System Restore.

The important thing to remember is that you can't do this after a problem has occurred; you need to create your repair disc ahead of time. So take 10 minutes and do it right now. At some point in the future, you may be awfully glad you did.

Part 2: Remove the Crapware

Now that you've created a system-repair disc for your new PC, let's get it running at peak performance. That means removing some, if not all, of the software that was preloaded by the system maker. Some call it shovelware; I call it crapware.

Why the derogatory moniker? Simple: The proprietary and/or third-party software that many vendors preload on their PCs is mostly junk. It consumes space on your hard drive, causes your system to boot slower than it should, and just generally gets in the way.

Yes, I'm looking at you, McAfee Internet Security 90-day trial. And Google Desktop. And Roxio everything. You're not bad products, but I didn't ask for you, and I don't want you unless I want you. Get it?

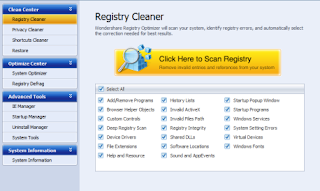
Uninstall crapware but worry that there may be shatters remaining here and there, say, in the registry? Well, this worry is not groundless. Some invalid keys do stay in the registry after installation. And in this case you can use registry optimizer software to clean them.


Part 3: Keep It Secure

Now let's talk security. As any regular people know, computers and their users are vulnerable to all manner of threats, from hackers to spyware to viruses. That's why it's critical that you batten down your new machine's hatches right from the get-go.

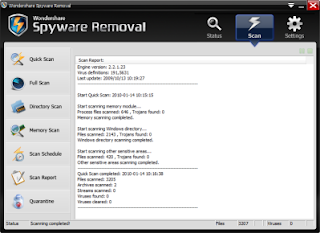
Psst! Guess what? Right out of the box, Windows 7 is already pretty darn secure. And there are many security utilities available online to choose, trojan, adware and free spyware removal, etc.


Meanwhile, the latest versions of Firefox (3.5) and Internet Explorer (8) help keep you safe from pop-ups, phishing attempts, browser hijacking, and the like.

As for e-mail, both Gmail and Yahoo employ Norton anti-virus software at the server level (meaning there's nothing you have to install), along with anti-spam and anti-phishing tools. If you happen to use either one, well, you've got clean mail.

There are a couple tools of your own to consider adding to the mix. The first is a router, which has a built-in firewall that effectively renders your PC(s) invisible to the Internet at large--so no hackers will be able to break in.

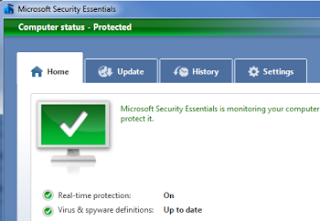
Second, for that little bit of extra protection, install Microsoft's widely acclaimed Security Essentials antivirus software.


Part 4: Create a Drive Image

Now that you've created a system-repair disc, dumped the junkware, and taken steps to secure your new PC, it's time to perform what I consider to be the ultimate hassle-prevention step: imaging (a.k.a. cloning or backup your hard drive).

See, right now your system is exactly the way you want it. You've got a fresh install of Windows (one that's newly free of crapware), the latest versions of your favorite apps (which I'm assuming you've already loaded), and all the security tools you need.

Wouldn't it be great to take a "snapshot" of this setup that you can restore in the event of catastrophe (or merely the inevitable slowing of Windows over time)? That's the idea behind creating a drive image: It can restore your PC to a like-new but custom-configured state.

You may never actually need the image file--but if you do, you'll be awfully glad you have it, for no one can guarantee that he/she will never come across a system crash or an impossible-to-remove virus.

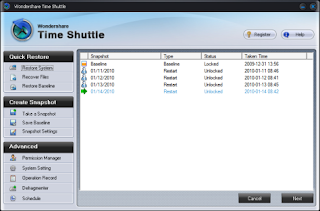
Traditionally, software you use to backup your drive just packs and compresses all your data in certain format of file which usually takes one third to half as large size as original data. That means if you want to image 10 GB data on your drive C, you will have to spare another 3 to 5 GB for the backup file. And procedures of backup and performing restore can be very complicated and time costing. Here I’m telling you that there is a tool called Time Shuttle that it can image your drives without any space taken, and create images and perform restore both in seconds. Yes, don’t doubt it, and it just can do that!

After you finish the four steps, it’s not exaggerated to say your computer is hassle-free. Now go forth and enjoy that new PC! And let me know if you run into any other hassles that need solving.

Tuesday, January 12, 2010

Best Way to Recover Files

When we talk about file recovery, generally we mean using software to recover files. Before we go to find the best way, let’s figure out why deleted or lost files can be recovered and how. To make theoretical and full understanding of files recovery, we will have to introduce the data structure and storage theory on hard drives from basics, and that’s too complicated, so let’s explain it in a popular way.

A file on drive may be not stored in a whole lump; it’s distributed in some small pieces and connected by something like a chain. To visit the file, we only need to find the head of the chain. When we delete the file, actually we just delete the head of the chain. We can’t see the file any more via our operating system if without the head.But in fact, the rest and main part of the file is still where it is. Though when deleting the file, we can find that the space it takes is released while actually it isn’t. It just like it announces that the place is free for others to occupy. Only when this space is overwritten by other files is the previous file really deleted, erased and gone. This is the very point that recovery software makes use of to recover files. It just adds a new head for the remaining part of the file and let you see it again through operating system.So if you delete a file on a drive, as long as your later operations on this drive don’t take the place of that file, you can recover it through software. But if unfortunately they do, then just say farewell to the file. One thing is certain that if you cover a file with another that is with the same name, the previous one is sure to be deleted forever, unrecoverable.

In fact, the rest part of a file takes most space but if without the head, it’s meaningless.

Now we know how file recovery software works, and smart as you must be aware that you cannot guarantee 100% file recovery through software, at least not currently. How can you be sure that you haven’t taken any operation on a drive where you deleted a file earlier and want to recover it?

The way above can save some emergency, but there is too much randomicity involved. So next we are going to talk about a method that can guarantee 100% file recovery.

Here we use a program called Wondershare Time Shuttle. One of its features can perfectly realize 100% file recovery.

The principle of Time Shuttle is kind of like protection. All data on Time Shuttle involved drives are well protected and the rest part of a file we mentioned above is also kept not to let others to occupy. Thus no matter what you have done on the drive after you delete a file on it, you can easily get it back, no need to worry whether its place have been overwritten. Even if you cover a file with another file with the same name, you can get the old version back!

And this is merely one feature of Time Shuttle. There are still more it has. Download it and it will bring you great pleasant surprise!